
The notion of designing and planting a new perennial border may fill veteran gardeners with anticipatory glee, but new gardeners often experience sensations more akin to a panic attack. Not to worry: there’s a first time for everything, and by following a few basic guidelines, you have every reason to expect success.
Perennial (often called herbaceous) borders are a British concoction, and were traditionally located in front of fences, hedges and walls, often on “the borders” of the property, and were usually rectangular. These days, almost any large flowerbed filled with permanent plantings is called a perennial border, even free-standing “island” beds. The advantage of this static system is that it relieves gardeners of the work and expense of planting annuals each spring and waiting for them to fill in. Well-chosen perennials require little maintenance throughout the growing season, returning bigger and better every year. By selecting species that bloom at different times of the year, perennial borders can be in flower from spring until autumn.
Your new border should blend in with your overall garden design: in yards where the existing plantings are relaxed and casual, curved borders and island beds may suit best, while more formal gardens structured on geometric principles and straight lines will look better if rectangular beds are employed.
How to create a perennial border
1. Evaluate the site
Choosing the location is crucial. I usually recommend that if it’s your first attempt planting a perennial border, you pick a flat site with at least six hours of direct sun per day. Most perennials are sun lovers, so selecting a sunny spot provides you with a wider plant palette before you even put shovel to soil. I also advise against planting next to mature trees, as most young perennials are unable to compete with these garden goliaths for sunlight, water or nutrients. If the new border can be seen from an important window in your house or an outdoor seating area, so much the better.
The next thing to consider is the soil. Is it usually on the wet or the dry side? Is it mostly clay, sand or something in between? Soils at either end of the spectrum—mostly clay or mostly sand—can be improved by incorporating generous amounts of organic matter, such as leaf mould, composted manure and your homemade compost. Not many perennials tolerate persistently soggy soil. If this describes the area you’re contemplating, either improve drainage by burying weeping tile (perforated plastic pipe) to divert the water, raise the planting area or choose another location.
2. Map out dimensions and remove sod
Map out the section of the garden where your border will lie, and visualize it full of plants. For rectangular beds, use string and garden stakes to delineate the area; for curved beds, a rubber hose works well.
The average perennial border is between six and seven feet (about 2 m) wide; this allows easy access to the middle of the bed from either side for routine maintenance. If your border is situated against a wall, leave an 18-inch (45-cm) pathway between the wall and the back edge of the border for access. A deeper bed, say eight to 10 feet (2.5 to 3 m), permits a wider range of plant heights. For a border this wide, you’ll need to consider pathways or strategically placed flat stones to stand on.
For most homeowners, there will be turfgrass to remove, likely the least satisfying part of this project. You can do this by smothering the grass with layers of wet newspaper and black plastic on top, but for this process to be really successful, it takes about a year. It’s much faster to sharpen a few garden spades and slice off the turf in sections, taking only one-half inch (1 cm) of soil away with the grass roots. Use the removed turf to patch bare spots elsewhere in your lawn, or stack it upside down and compost.
3. Fatten up your soil
To get off to the best possible start, you must first improve and feed your soil — regardless of whichever kind you find yourself working with — before installing plants. The Elizabethans talked about “fat soil,” which sounds strange to our ears, but it’s a term I like, as it implies earth that’s teeming with plant nutrients and enriched with beneficial organisms. The best way to fatten up your soil is to add organic matter such as compost, composted manure or leaf mould. Layer about four inches (10 cm) of organic matter atop the soil, then, using a garden fork, mix it into the top two or three inches (5 to 8 cm) of garden soil. If you’re making a large border, this adds up to quite a lot of compost, so buy it in bulk from a nursery or landscaping firm (farmers are another source). Allow newly dug beds to settle for a week or two before planting.
4. Add a focal point
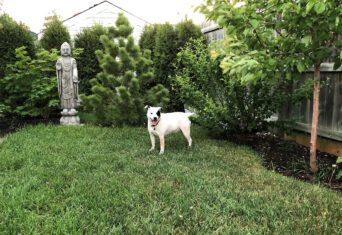
Perennial borders—particularly if they aren’t anchored to the rest of the landscape by buildings or boundaries—can seem flat and uninteresting, so many gardeners like to add permanent grounding features such as birdbaths, bird- and bat houses, sundials, sculptures, and all manner of teepees, trellises, arbours and other whimsical plant supports. Nevertheless, remember when adding non-plant material to a border, less is better; otherwise it can end up looking like a crowded mantelpiece. Borders also look more natural and integrated if they don’t just end abruptly, trailing off into nothingness. Employ existing walls and fences as natural endings or “bookends,” or install groups of shrubs or evergreens to visually hold in the extremities. Large rocks may also be used to serve the same function, but don’t get carried away or your garden will look like something out of The Flintstones.
5. Choosing plants
Now you should be about ready to plant. It’s a good idea to do some research and have a list of plants prepared before you head to the nursery—it’s easy to get carried away by whatever is in flower that day, and impulse buying isn’t good gardening practice. Many of the best long-lived perennials, such as Acanthus, Baptisia and Dictamnus, don’t look very prepossessing in a pot on the sales bench. Likewise, perennials that bloom later in the year, such as echinacea, monkshood and black snakeroot, might seem insignificant in spring, but can shine in the border in late summer/early fall. Include spring-, summer- and fall-blooming perennials on your list to ensure your new border is interesting throughout the seasons.
I like to start off with the healthiest, best-grown plants I can, so this means seeking out a reputable nursery that will stand behind its product. Avoid neighbourhood plant sales and large green clumps offered to you by well-meaning friends and relatives. The majority of these species are invasive (which is why they have so many to spare), and you can unwittingly pick up unwanted disease and insect pests at the same time. Rambunctious plants are useful for covering large areas but are difficult to control in a perennial border. Instead, go for plants that seldom need dividing.
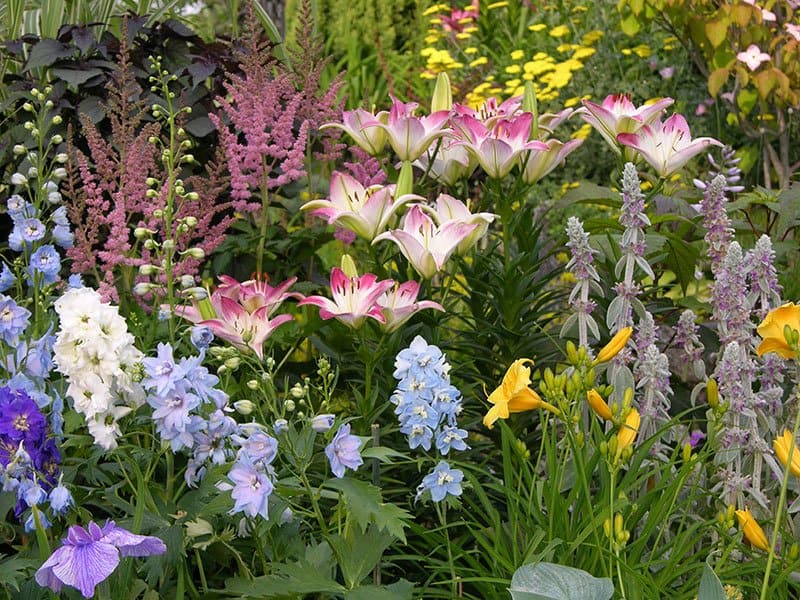
To add height and interest to your border, consider incorporating a few shrubs and vines with showy flowers or unusual, colourful foliage. Avoid planting different species whose foliage looks the same side by side (e.g., hardy geraniums next to Astrantia; daylilies next to Siberian iris). A good perennial border should always look appealing thanks to its attractive, contrasting foliage—even if there isn’t a single flower in bloom. Spring bulbs added to perennial borders boosts early-season colour, but keep in mind that their foliage takes a long time to mature (midsummer for most daffodils and tulips). Lately, I’ve taken to planting most of these bulbous plants in groups scattered throughout my lawn, mowing around them until their leaves die back.
Some gardeners like a riot of colour, others prefer to plant within the boundaries of a colour scheme. The choice is yours, but always try to plant in drifts (buy perennials in threes, fives and sevens) to avoid a spotty patchwork of botanical orphans. Single “specimen plants”—those with unusual growth forms or leaf colours—may be used as accents or punctuation points within the border. Vary plant heights so not all the short perennials are at the front and all the tall ones are at the back—bays of low growers juxtaposed with promontories of taller ones make for more dynamic displays.
6. Planting day — at last!
The rest is easy, not to mention huge fun. Wait for an overcast day, then place the plants in their pots on the soil surface, allowing for their eventual width at maturity, and remembering to group like plants together in drifts. This may take you several hours, and will involve a great deal of to-ing and fro-ing, and very likely a glass of wine or two. Once everything has been placed the way you want it (for now at least!), you can begin digging your planting holes. At this point I always add extra organic matter to the bottom and sides of the hole, being careful to mix it together with the native soil.
Place plants at the same depth as they were in their pots, press into the earth firmly and water thoroughly. Transplanting solutions won’t be necessary if you mixed in sufficient organic matter with your existing soil.
Once all the plants have been installed, cover the exposed soil surface with a three-inch (8-cm) layer of organic mulch to help conserve moisture and discourage weeds. Water perennials regularly during dry spells until they’re well established, and enjoy non-stop flowers every year.
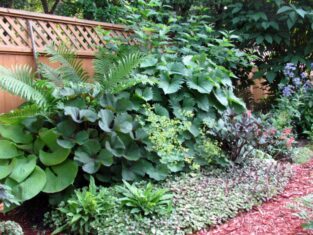
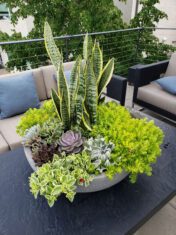
Foliage is forever
A perennial border based solely on flowers is a missed opportunity. Look for perennials with interesting leaves: fuzzy, spotted, striped, purple, glaucous, chartreuse, silver or bronze. The following perennials excel in the foliage department and are hardy to Zone 3:
- Lady’s mantle (Alchemilla mollis)
- Artemisia
- Bergenia
- Siberian bugloss (Brunnera)
- Heuchera
- Hosta
- Ligularia
- Lungwort (Pulmonaria)
- Sedum
- Lamb’s ears (Stachys byzantina)
- Also: ferns and ornamental grasses

Perennial border plants with no dividing necessary
Reduce border maintenance by including perennials that seldom need dividing. All are hardy to Zone 3.
- Monkshood (Aconitum)
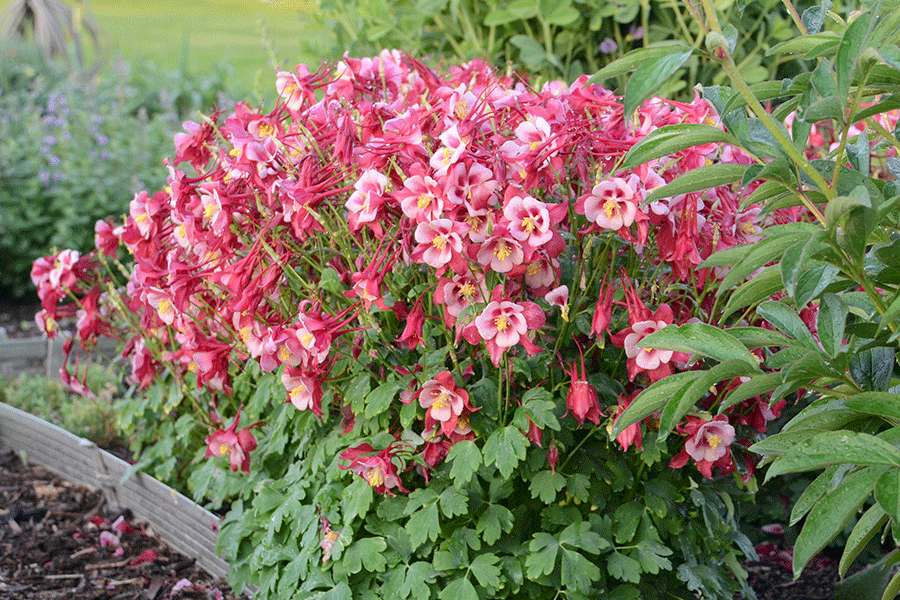
- Columbine (Aquilegia)
- Goat’s beard (Aruncus dioicus)
- False indigo (Baptisia australis)
- Black snakeroot (Actaea racemosa)
- Gas plant (Dictamnus albus)
- Globe thistle (Echinops ritro)
- Cushion spurge (Euphorbia polychroma)
- Cranesbill (Geranium)
- Hosta
- Peony (Paeonia)
- Balloon flower (Platycodon grandiflorus)
- Pasqueflower (Pulsatilla vulgaris)
- Meadow-rue (Thalictrum aquilegiifolium)
More by Stephen Westcott-Gratton

Great Article
I’ve had to learn the hard way spending copious amounts of money and replanting plants to a better position!
At long last my Boarders are full of billowing, romantic plants nestling (I hope) joyfully side by side.
I never thought I’d be this old man splitting Perennial’s and discussing propagation tips. Plus reading such clever informative articles. It truly would have helped if I’d read this 20 years ago.
Happy Gardening 🌹
Excellent article. I wish I had read the part about the walk way along the fence before putting in my 4ft border around my yard. It is too wide and I am perpetually doing yoga lunges.
2) If you are moving into a newly build suburban house, DO NOT DIG into that newly laid lawn. It is invariably dead heavy clay and will take 5 years of working before it becomes productive. Layer newspapers and good soil on top and replenish every year otherwise, you will ruin your knees.
Thank you so much for this practical and clear instructions about creating a border! It has taken me about five years to lean some of these lessons! “Impulsive shopper” and taking “gifts” from friends gardens! Yes completely agree!
I have a little summer house in Prince Edward Island Canada and cannot take of the gardens in early Spring, any ideas for these kind of situation would be appreciated!
May we all keep gardening and making the world beautiful!
I loved growing Baptisias and they flourished in my garden in Hastings every year. Now, we live in Cobourg we have a very large Black Walnut tree right next to our fence and they are not friendly with Baptisia plants, alas!
loved the article; more, please!! useful lists of plants. and tips for plant shopping.. M.
Stephen W-G has hit it out of the park -or should I say garden,again! A very informative article on Baptisias followed by this excellent and comprehensive advice on making a new perennial border. Several smiles included, too many ornaments may make your border look like a ‘crowded mantelpiece’ and the glass of wine needed when decided on final placement of new plants. I liked the idea of ending a border with a grouping of shrubs or evergreens, and yes, plant sales should only be approached when you have a reasonable knowledge of what you are buying but can be a source of treasures too.
Now Mr.Westcott-Gratton please write the next article on soggy soil areas. Definitely to be avoided for a general perennial border but they are a delight for moisture loving plants such as ligularias, primulas etc. I recently had new seedlings of ligs develop naturally and this year the tiny plants are flowering too.
Thanks for sharing your wide Hort knowledge through my fave magazine,
Gardenmaking.