

Wouldn’t it be nice to grow your own favourite bulbs for spring-flowering containers? Most first attempts involve planting the bulbs in containers in the fall, watering them and waiting for spring. With few exceptions, the result is a container filled with wet soil and rotted bulbs.
What happened? Well, there is this natural phenomenon that shaped Canada’s landscape AND has now killed your bulbs. This expansion and contraction of water is better known as the dreaded freeze – thaw cycle. It happens when the warm, sunny days and frosty nights of late winter thaw your containers during the day and re-freeze them again at night. Soil shifts in this cycle, contracting during the day and expanding at night, ripping apart the roots and/or bulbs. Deprived of roots, your bulbs can’t use the moisture and simply rot. The trick is to keep the containers frozen throughout the winter until later, when the risk of them re-freezing overnight has passed.
My foolproof method
There are several ways to force bulbs for spring-flowering containers, but I recommend this foolproof method. It’s easy and simple, too.
1) Bulb selection
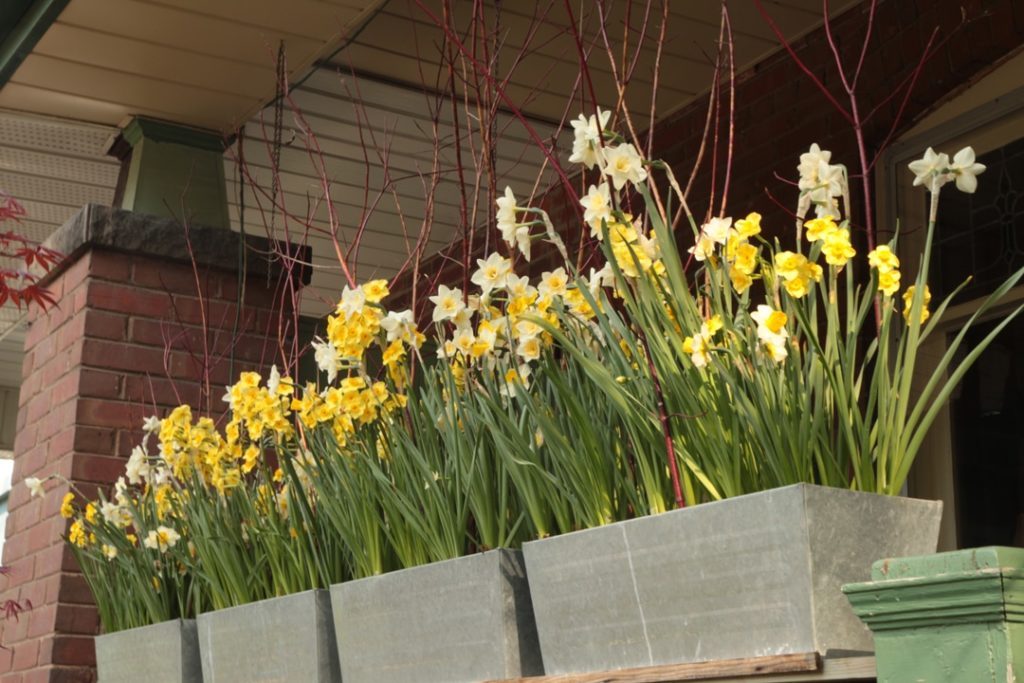
Try to avoid tall flowers if you have a windy location, then consider those you like most. I’m a big fan of fragrant bulbs, probably because my spring containers are on the front porch where, regardless of the weather, I spend time reading. I’m a narcissus lover so that’s my preference, but you can use tulips, crocus and muscari, too.
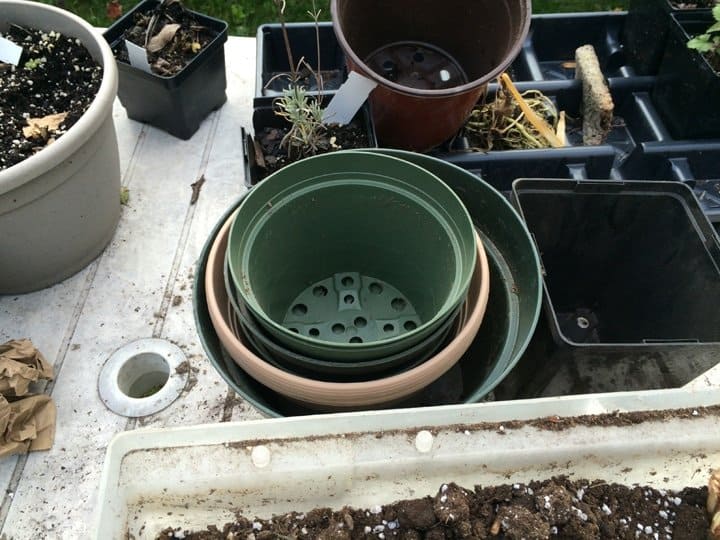
2) Potting
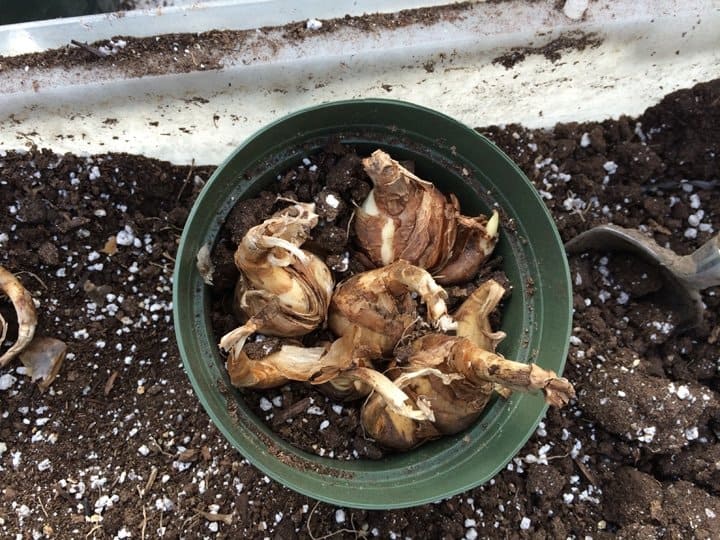
Chances are you’ve got some old plastic pots around (you’ll see why I recommend these later) for potting. Use any well-draining soil, planting only one variety per pot (e.g. Narcissus ‘Ice Follies’). Pack as many bulbs as you can in each pot and label it. You may wonder why, but you’ll be glad you did in the spring when you try to remember which is which, let alone what’s what. Don’t worry about planting depth. Water well.
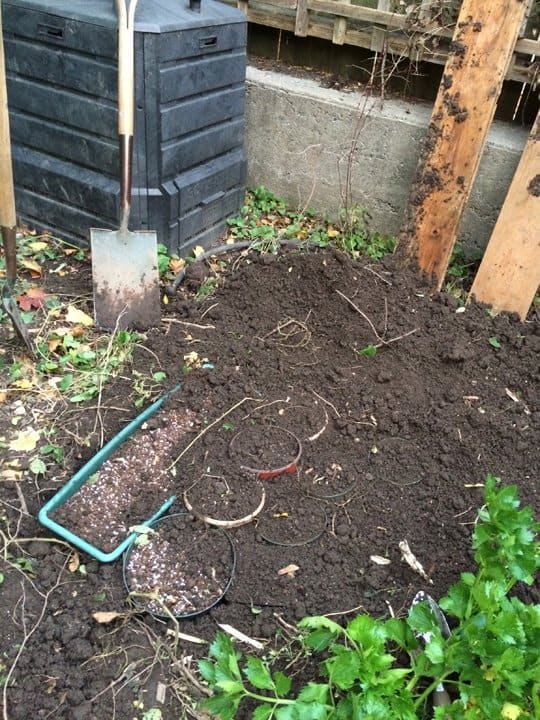
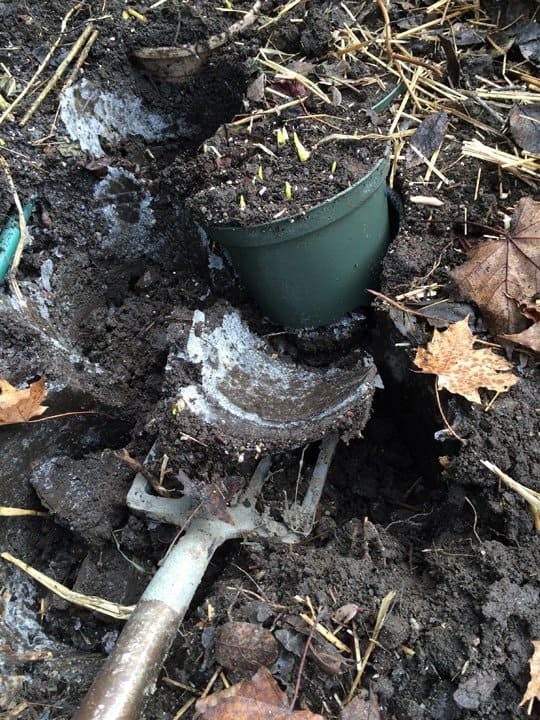
3) Burying
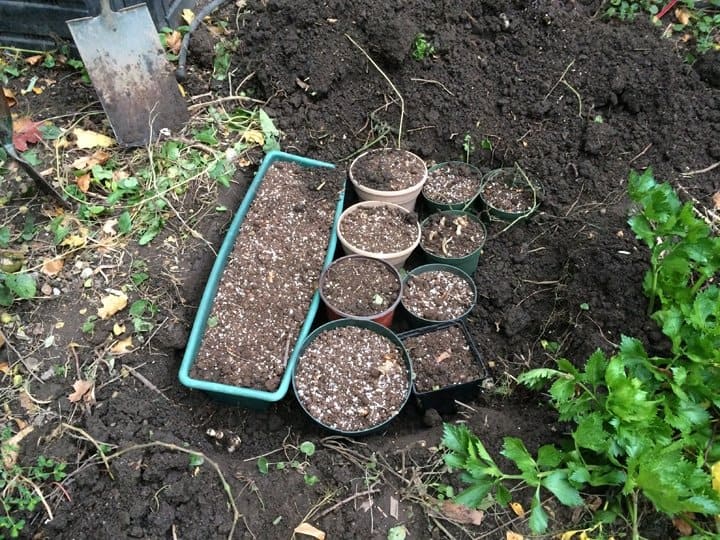
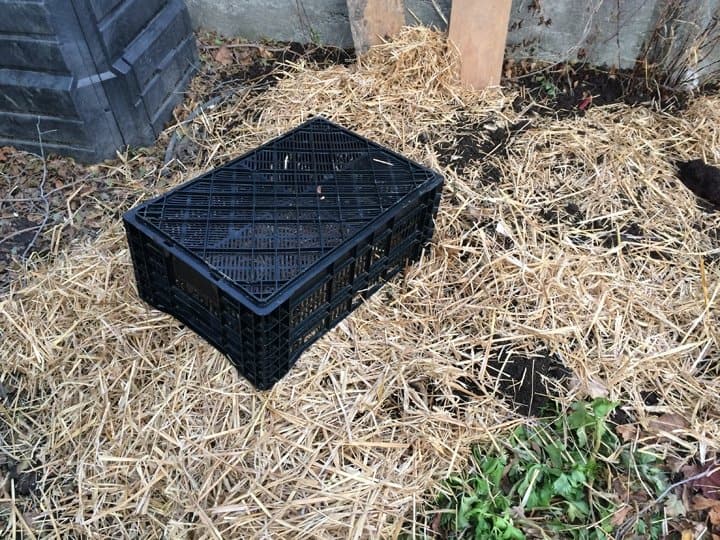
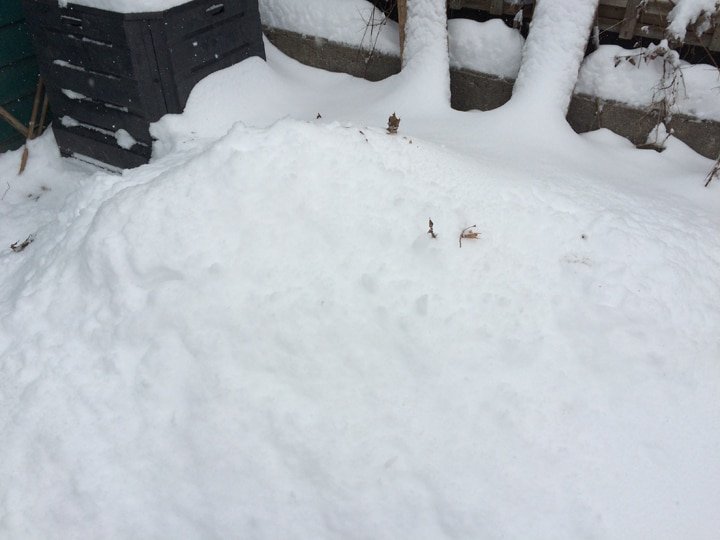
Bury your pots with their tops at soil level and fill in around them with more soil, making sure to eliminate air pockets. I use a part of my vegetable garden that’s empty by October. Cover with a thick layer of mulch to delay their freeze-up and mark the area with a tall stick. In winter, keep as much snow on the area as you can for insulation. Now all you need to do is practice the first rules of gardening – patience, plus the eager anticipation of the upcoming spring.
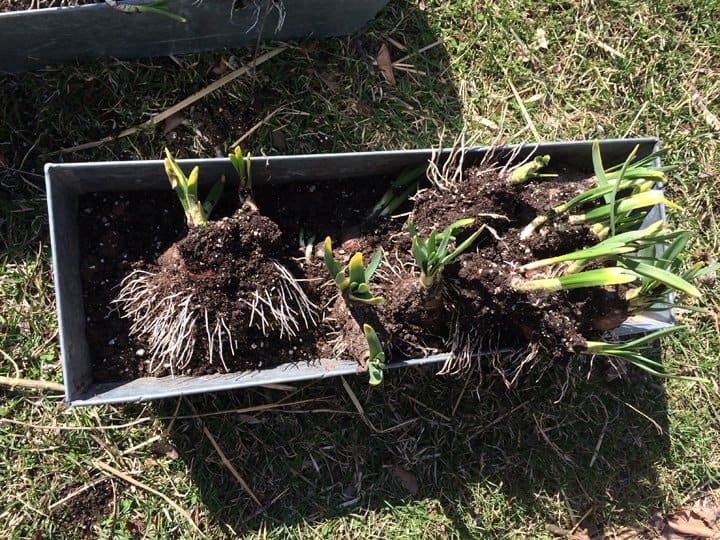
4) Digging up
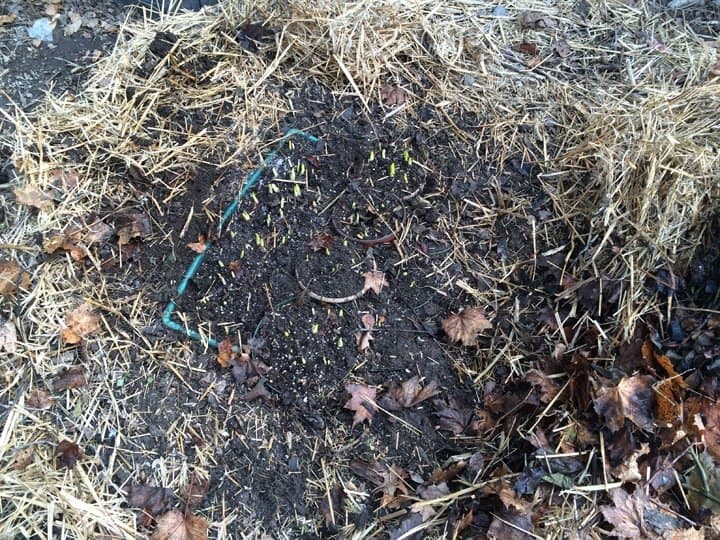
I know it’s hard to wait, so you can peek under the mulch in late winter to see how they’re doing, but it’s best to wait until the snow is gone and your garden is starting to wake up before taking the mulch away. Chances are there will be little shoots on most of them. Don’t worry if they don’t all have shoots peeking through – not everyone wakes up at the same time.
Pry the pots from the ground once the soil surrounding them has thawed a bit and the risk of hard frosts at night is past. Don’t worry if the pots are still frozen, the bulbs don’t mind. You’ll be glad you used old pots as they’re easily damaged. Place the pots in a sunny spot to thaw out for a few days.

5) Replanting
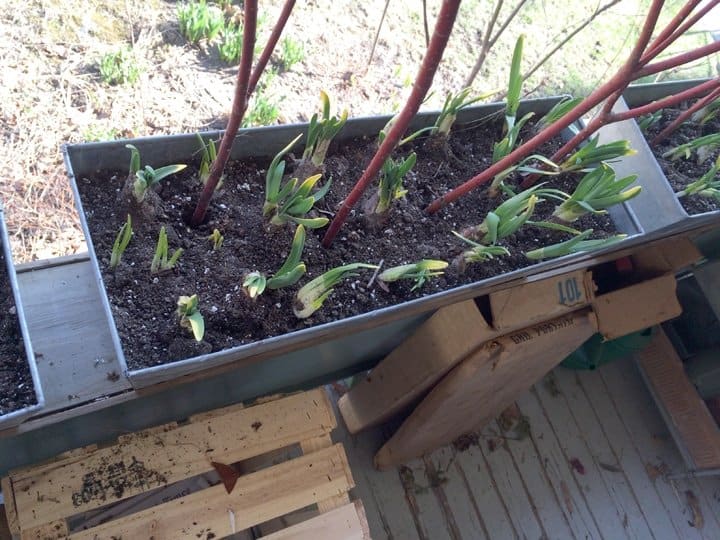
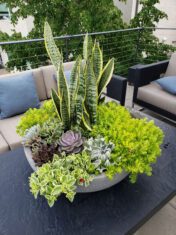
This is the fun part when you get to design the look of your spring container, which bulbs you want to combine for best effect, and thank yourself for taking the time to label them all last fall. Your bulbs will have roots that will be fairly dense in the jam-packed pots, so gently tease them apart before you place them in their new container. Containers look best when full, so plant lots in each. Add a little slow-release fertilizer and water well. I add a few red dogwood branches for a fancier look and to support the taller flowers. Like the bulbs in your garden, your containers should be in full sun. Now stand back and enjoy your blooms. Deadhead spent flowers to keep them looking great.
6) Saving the bulbs
I hate to throw anything away and your container bulbs can be saved, too. Move the containers to an inconspicuous part of your garden once the flowers are finished. Keep them watered until the foliage has fully ripened. You can now plant them in your garden (at their proper depths this time) or leave the containers in your garden until fall and plant them then. No, they can’t be forced again, but they will happily grow and flower in your garden for many years.
Other methods for forcing bulbs
You can use a spare refrigerator set to the coldest setting. Just don’t put any fruit in the same fridge (fruit gives off ethylene gas, which spoils the flowers in bulbs).
An outdoor shed can work, too, provided it stays cold throughout the winter (sunny days can warm sheds, too).


I have a barn that is unheated ( the water will freeze in cold temp .and there are no animals in it ). Can I put the bulbs in their earth containers and not bury them ( knowing they would freeze ) and then pull them out perhaps in March , pot up in pretty containers and bring in the house for an early display of tulips and daffodils? Can I do this with paper whites as well or those bulbs best just to have a cold but not frozen time ?
I also noticed you put a large black box over the planted pots . Did you put mulch underneath ? Leave it on through the winter to mark or further protect the area ?
Thank you kindly for your advice.
Sincerely, Krystyna James
Paperwhites do best in the house in a cool, bright location–they’re tender bulbs. Regarding forcing bulbs in your barn: To be safe, I’d insulate around the planted bulbs to keep temperatures fairly consistent. Place the pots in the warmest section of your barn, if you can. You can bring the bulbs into the house in spring, once they start to sprout. I’m not sure if Dugald Cameron (the author of that article) mulched under the large black box. Perhaps he did, as added protection.
Brilliant! Sometimes it’s hard to find space in the sunny garden bed for new bulbs but I can’t resist buying new ones every fall. I always wondered if there was a way to have bulbs in pots overwinter without a greenhouse.
I have just planted all my extra bulbs in pots and will sink them in the veggie bed. Thanks so much for this!
What if you only have containers? For example a rooftop or fire escape container garden? Are you able to do spring bulbs?
Good one Dugald. Is it possible to grow all types of flowers or just a select few? I would love to grow the purple rose similar to the one shown( http://www.flowerscanada.com/roses/passion-for-purple-roses ). I believe they last all the seasons. I would try your method and see how it pans out.
My instructions were for a selection of spring flowering bulbs. Roses are an entirely different matter as they’re woody plants with much larger root systems and require different methods to grow in a container.
Your method will certainly work and you’ll save some work. The drawbacks are the higher costs of potted pre-grown bulbs and the limited selection.
I will try that but don’t have a vegetable garden! To have bulbs in containers I have bought them in tight bud in the stores and then hardened them off during the day in spring sunshine and then put them in their permanent containers after about 5 days